Bathroom Remodeling Process
Blog
Bathroom Remodeling Process: What Happens From First Call to Final Walkthrough
A plain step-by-step look at how a bathroom remodel goes in Cape Coral.
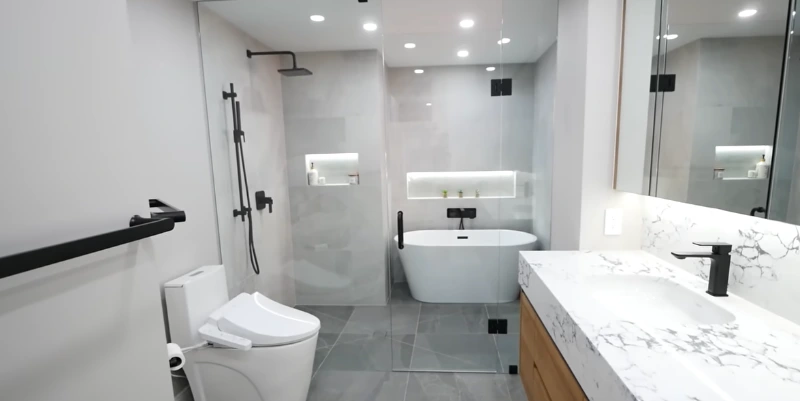
Most people have never remodeled a bathroom before, so they have no idea what the next few weeks will look like. Who shows up first? When does the tile go in? How long is the toilet out of service? Here is the bathroom remodeling process from start to finish, in the order it usually happens.
Step 1: The first call and the walk-through
It starts with a conversation. You tell us what bugs you about the bathroom, what you want, and roughly what you want to spend. Then someone comes out to look at the space, take measurements and check what is behind the walls where we can see it. In Cape Coral that often means checking for old plumbing, soft spots near the tub, and how the bathroom is vented. You can call us at (239) 374-4906 to set this up.
Step 2: The estimate
After the visit you get a written estimate. It should list what is included, the materials, and the permit costs as their own line. Ask what is not included. A low number that leaves out the tile or the demo is not a low number. If you want a rough idea of what these projects cost for different sizes, we cover that on our FAQs page.
Step 3: Picking your materials
This is the fun part and also the part that holds jobs up. You choose tile, vanity, faucets, shower fixtures, toilet, mirror and lighting. Special orders can take weeks to arrive, and the order has to be placed before demolition starts, not after. A few things worth settling early:
- Tile size and pattern (bigger tile means fewer grout lines)
- Shower type: tub, walk-in, or a curbless entry
- Vanity size and storage
- Fixture finish, so everything matches
Our pages on tile, flooring and fixtures and vanities and cabinets go through the choices in more detail.
Step 4: Permits and approvals
If the job changes plumbing or electrical, it needs a city permit. If you live in a condo or an HOA neighborhood, you will likely need approval from them as well. Both take time, so we start them while your materials are on order. Our post on bathroom remodel permits in Cape Coral explains what the city looks at.
Step 5: Demolition
The old tub or shower, vanity, toilet and flooring come out, and sometimes the drywall too. It is noisy and dusty for a day or two. We cover the path through your home and haul the debris away. This is also when surprises show up: rot behind a shower wall, old galvanized pipe, a drain that is not where the drawing said it was. Good contractors tell you right away and explain the options.
Step 6: Rough plumbing and electrical
With the walls open, the plumber moves or replaces the drain and supply lines, and the electrician adds outlets, lights and the exhaust fan. If a permit was pulled, the city inspects this work before anything gets covered up. It is the inspection people forget about, and the one that matters most.
Step 7: Waterproofing and prep
Before any tile, the shower area gets waterproofed. This is the step nobody sees and the one that decides whether your shower leaks in five years. In Florida, with the humidity we deal with, we take it seriously. Walls get new backer board, the shower pan is built and tested, and the seams are sealed.
Step 8: Tile and flooring
Now it starts to look like a bathroom. Floor and wall tile go in, then grout a day later after the setting material cures. Tile work is slow because it has to be done right, and rushing it shows. If you are planning a larger or custom shower, our shower and bathtub remodeling page shows what that looks like.
Step 9: Vanity, fixtures and glass
The vanity, countertop, sink, faucet, toilet and shower trim go in. Then the glass shower enclosure is measured and made. Glass is custom, so it is often measured after the tile is done, and it can add a week or so to the schedule. Tell us early if you want glass, so we can plan around it.
Step 10: Paint, final touches and inspection
Painters finish the walls, the accessories go up, and everything gets tested. Water runs, lights work, the fan moves air. If there was a permit, the city does a final inspection. Then we do a walkthrough with you. You point out anything you do not like, and we fix it before we call the job done.
How long does it take?
A lot depends on the size and on how long materials take to arrive. Many standard bathrooms take a few weeks of actual work, while larger or custom projects take longer. Waiting on a special-order item or a custom glass door is the most common reason a job runs over. Ask your contractor for a start date and an end date in writing, and ask what could change them.
Can you use the bathroom during the remodel?
Not the one being remodeled. Plan on using another bathroom for the length of the job. If it is your only bathroom, tell us up front and we can talk through the schedule. For homes with a single bath, we try to keep the time without a working toilet as short as we can.
A few tips from the job site
- Order materials before demo, not after
- Decide on your layout before the walls open up. Changes midway cost money
- Keep a little extra in the budget for surprises behind the walls
- Ask who will be on site each day and who to call with questions
- Take photos of the walls before the tile goes on, so you know where the pipes are
Whether it is a small bathroom, an accessible bathroom or a luxury remodel, the order of steps stays about the same. We work in Southeast, Southwest, Northeast and Northwest Cape Coral.
Get Your Free Quote
Get a Free Bathroom Renovation Estimate Today
Tell us about your space and what you want to change. We will schedule a visit and follow up with a written, itemized estimate.